
How to Install Tube Slide in Home
If you are like me and you have found this post its because you have been looking for the best place to buy and find a Spiral Tube slide for your home or deck. This post will show you how to install tube slide in home and give you an idea of what it could look like, but more importantly it will show you where I bought the tube slide. I shared a video of my kids reaction to seeing the surprise that I made for them this past weekend and it got shared a ton of time and inspired many people to want something fun like this for their kids. The thing that I didn’t realize is how much exercise they would get running up the stairs to play on this slide in the home all day and that is pretty awesome. I took me about 6 months from when I had the idea and vision to install a tube slide in our home until the time that it was officially installed. We finally built it with a playhouse this past weekend. The reason it took me 6 months is because I couldn’t find an affordable 9ft deck tube slide for the life of me. They were averaging around $6,000 to $9,000 which was ridiculous to me. I finally found a place called Backyard City online and the slide was $879 for a 7 ft deck tube slide and then you can add 1ft add-on sections up to 3 of them for a 8ft, 9ft or 10 ft deck. I purchased the 7 ft tube slide and added the 2 extra sections to my cart to make it a 9 ft deck slide. The extra 2 sections costs $570 and the shipping was $120 for Western States. I was taking a chance because I couldn’t see a photo of what the tube looked like at a 9ft deck height and so my hopes is that this post will help you see that ( at least for a 9 ft deck) and what we did in order to make sure that it was mounted strong and so it will last a long time.
Once I placed my order the package took about one month to arrive and it came on a pallet in about a a 6 ft square box that was about 4 feet tall. We planned a night and full-day with my friend Chuck who is a builder ( he designed the entire mount and playhouse) and my good friend Josh so we could work together and have somebody with experience to build the playhouse and mount.
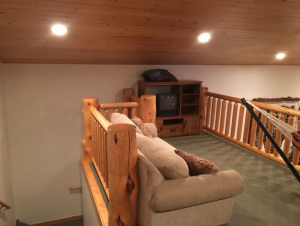
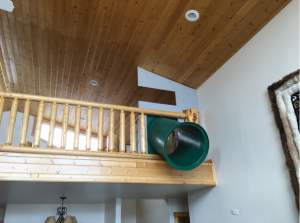
Before picture of the loft
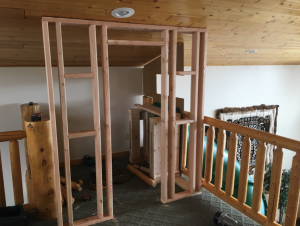
Next we cut out the four posts to fit the slide.
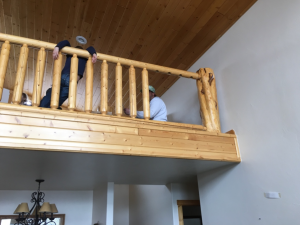
 Next we built a strong reinforced “slide entrance” which is bolted to the floor with 6 inch Lag bolts. This is to ensure that there is no downward or outward pressure agains the loft railing. We made sure to find in the floor the ceiling joists to have a secure and solid base to mount the slide against!
We used a cheaper siding from Home Depot for our playhouse wall. We painted these 3 sheets we purchased the night before as well as applied a stain to the trim that we will be showing you next for the windows and the door of the playhouse.
While Chuck built the side walls with 2×4’s, Josh and I spent time working on putting the slide sections together. The one thing that I want you to know if you pick this slide from this company because it is far less expensive we had to drill new bolt holes on most sections because they were not signing up. It wasn’t that big of a deal and the final product looks really good despite that small extra trouble.

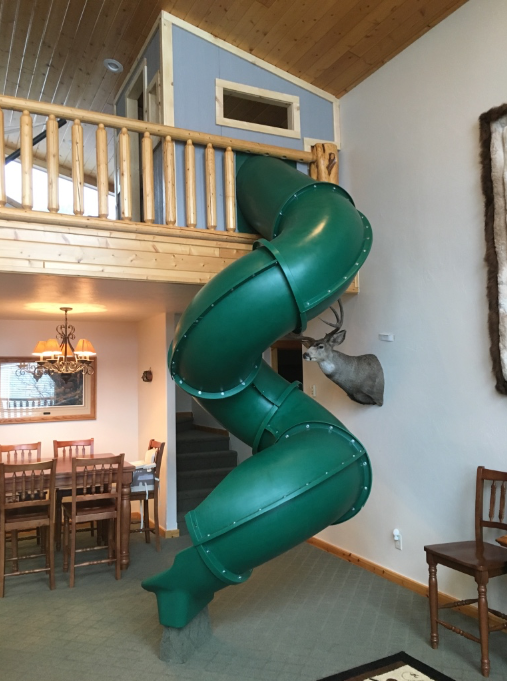
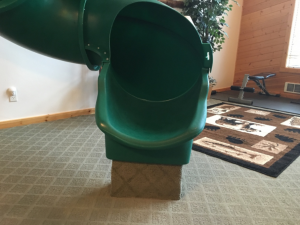
Because we mounted the 9 ft deck slide above the 9ft deck to make sure it was STRONG and mounted to our “slide entrance” we had to add a little height to the bottom of the slide to secure it to the ground. We used wood that we had and notched it into the bottom of the slide. We built it about 2″ higher than we needed to and pressed the slide up higher so that it is really solid and has no room to slide around at the base. The slide DOES have a cutout in the bottom that is 3″. We than carpeted the base mount so that it looks nice.
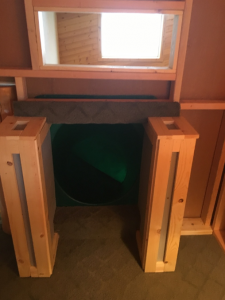
We have not yet put sheetrock on the inside of the playhouse and where the slide mounts to our “slide entrance” but we did do some awesome trim work on the entrance as well as add a 2X4 that is carpeted for a handle and grip to launch yourself down the slide. We also carpeted the place where the kids or adults like me sit to enter into the slide.
The final work to make the slide and and playhouse look nice was to add a “reveal” trim to the doors, window, sides, and top side of the playhouse. We originally wanted to build a wall on the backside where the stair case was but decided it would feel bigger and more open with out a wall.

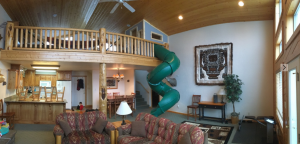
I’m just one of those guys who wants to have the most fun with this short amount of time in this world and inspire others to do the same with their lives. I aspire to be a hero and great example to my children and so excited to help others do the same. I will show you the before after picture side by side along with the FUN video of my kids first reaction to seeing this slide and a short clip of my wife Gabby ( mother of 5) enjoying life and the slide at the same time. If this post helps you pin some pictures to your Pinterest and share with your friends!
Thank you so much! I want to do the same thing for my house and couldn’t find an affordable option! I was just about to forget the idea when I found your post and it’s back on!
I just wish they ship to Canada now…
I hope you find somewhere to get a slide ordered! I have found that you can use shorter height slides and order extra sections! 🙂
Did you ever find a way to get a slide to Canada, Josee? I’m in Canada too and say that Backyard City doesn’t ship to us 🙁
You could possibly find a private shipping 3rd party company!
I am so glad I found this post, it gives me encouragement! I have been wanting to put this slide in a house I will be building. It will be going between the main floor and the basement, between the joists. I have called the seller but am unable to get the information I need to finish the plans. Do you have any idea how many feet the slide extends from the entrance until it would all be below the floor? I need to know how large of an area it will take on the main floor.
Thank you!
Becky I will have to measure the distance that it extends next time that I go up to our cabin! You will LOVE having one in the home! 🙂
Thanks for sharing. I found the same website for our backyard slid we want to put in off our deck. I wasn’t sure how the extra sections worked until I found type post.
That’s awesome David! I would love to see the pictures when you get it mounted off your deck and If you don’t mind I may share them on this post!
So cool! I just scored a 12’tube slide for our tree house. I bought it from a McDonald’s that had closed. We’d previously ruled out a slide because of the insane price once you get over 8′. We completed tear down this morning. Here’s hoping the reassembly doesn’t kill us!!!
I love that and so happy that you guys got a GOOD DEAL and price! I want to see the pictures when you have that thing installed!
We just bought a house with a 9 foot high deck that has no external stairs to get to the ground and were considering a tube slide for the kids. I was amazed at how expensive they were once you get above 7 feet. I finally stumbled across Backyard City’s site and was excited to find one at a reasonable price.
I found your post a few links later in my search results, so it was nice to see someone else bought the same product and had success. I’m strongly considering getting this slide if I can verify the angles will work. The issue we have is that the deck is 9 foot high, but right after the deck the yard drops another 5 feet or so, so I can’t have the slide hang of the front of the deck as that’s too high, but if I hang it of the side they might be exiting the slide right in the corner of the house.
Hopefully I can figure out a way to make it work.
I was worried about which way this would shoot out as well with the angle but if you are shooting for 9 feet you can see from the photos the angle that the slide will end out facing. Your also able to change the degree just slightly by rotating each tube a bolt hole at the connections!